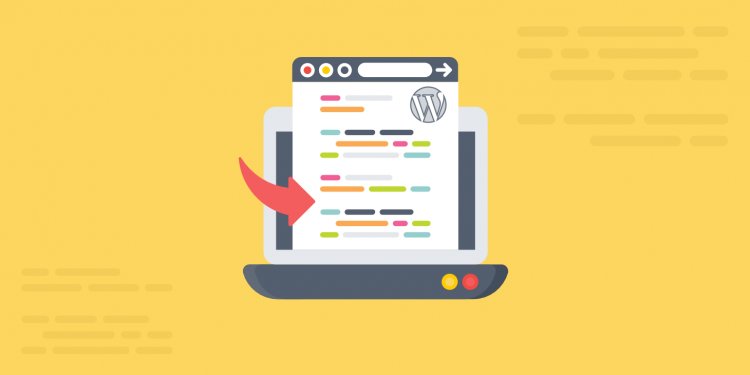
How to publish your content on WordPress?
Publishing a WordPress post on your website is important for generating traffic. Here is a quick and easy guide on how to publish articles in WordPress.
Publishing a WordPress post on your website is important for generating traffic. Here is a quick and easy guide on how to publish articles in WordPress.
You have heard about the benefits of blogging on your website:
- Retain your customers to build affinity with your brand and maintain a priority level of awareness,
- Help your customers better understand your products and services to stimulate desire and ensure they get all the benefits after purchase, and
- Improve your search engine rankings to attract more new prospects and customers interested in the topics you write about.
So you have taken the plunge and invested in a blog for your website. Now what? Well, the success of your blog is mainly decided by the articles you publish. Therefore, learning how to blog is a good place to start.
With this in mind, we created this tutorial that explains some of the basics of blogging.
Publishing a WordPress post
Once you have written a post and are ready to be published on your blog, log into your WordPress account. Find "News" in the sidebar and click on it. Then click "Add New". This is where you create your WordPress post.
Then fill in the corresponding fields:
- Enter a title for the article on the first line. The title should be concise and descriptive (using keywords that are related to the content of the article) and arouse the interest of the reader in getting them to read the article.
- Enter the content of the article in the text box below the title by typing the text or cutting and pasting the text from a word processor. To cut and paste text from a word processor, simply highlight the text in the word processor document and copy it and paste the content into the WordPress text box.
- Formatting text (e.g. bold text) and converting text into links can be done using the toolbar above the text field.
- Save the article as a "Draft" (the button is at the top of the right sidebar). You should keep it as a draft until the article is completely written and formatted. In draft mode, only you can see it; it will not appear on the live website.
Inserting an Image to your post
Above the formatting toolbar (just above the text box) find the "Add Media" button.
To insert any image into your WordPress article:
- Hover over the article where you want to insert the image.
- Click on the "Add Media" button, then click the "Upload Files" tab on the next screen.
- Follow the instructions available on the screen to find the image file on your computer and upload it to the WordPress media library.
- Select the image in the library, change the settings in the Attachment Details section, and click the Insert to Post button in the lower-right corner of the screen. This will insert the image into the article.
How to add Featured Image
Each WordPress post must have a specific main image, the so-called "Featured Image". This image usually appears as the main large image at the top of the post, although this may vary depending on the blog layout.
The featured image is also used in various other applications, including social media sites where the article is shared. Therefore, it is important to include a featured image. The process for selecting a featured image is similar to adding an image to the body of your post. However, instead of clicking the "Add Media" button, click the "Set Selected Image" link in the lower right corner of the screen. Then upload the image and select it using the media library. Remember to save your design after selecting a featured image, otherwise the featured image will not be saved.
Assigning certain categories to your posts
WordPress allows you to create categories and sort your posts in those categories. These categories can be used to display articles in meaningful groupings to your readers. For example, if your blog is about groceries, you could have several categories like "Starters", "Main" and "Desserts". All starter items would be classified as "starters", main course items would be classified as "main courses", and so on. WordPress also allows you to assign a post to multiple categories. For example, if you are writing an article that covers both starters and desserts, you can divide it into both categories. Every WordPress post must be assigned to at least one category. By default, WordPress offers a category called "Uncategorized". If your blog contains very few articles, the first step is to simply assign them to the "Uncategorized" category.
However, as soon as the number of articles on your blog increases, consider how to divide them into multiple categories based on the interests of your target audience. The longer you wait to create your categories, the more articles you will have and the more difficult it will be to place all your articles in the new categories. So do not wait too long to plan your category structure.
To create and assign categories:
- Find the Categories field in the right sidebar.
- If the category you want has already been created, just click the checkbox next to the category name. You can select as many categories as you want.
- If you need to create a new category, click the "+ Add new category" link. Then enter a new category name, select a main category if you want to create a hierarchical structure, and then click the "Add new category" button.
Content tagging
Tagging your WordPress post will highlight the keywords covered in the post and allow your readers to find additional content on your blog on the same topic. Depending on your blog format, these tags may appear as clickable links at the end of your post, in the sidebar, or elsewhere. How are category tags different? Think of categories as broad general groupings and labels as more detailed groupings. For example, if your blog is about groceries and you have set categories for starters, entrees, and desserts, you can add tags that allow your readers to focus on what they are looking for. Interested. You can create labels for any specific type of food: "artichoke", "sauces", "pasta", "bread", and so on. An article in the "Starters" category can be tagged with "Artichoke", "Sauces" and "Bread" if these articles are included in the article. Using the tags, the user can easily find other articles that also deal with the "artichoke", for example.
Choose tags that are relevant to your readers. Keep your tags in mind to make it easier for your readers to find all of your blog content on the same topic. Avoid labels that are too specific or similar; combine them into one. For example, instead of using "Penne Rigate", "Rigatoni" and "Rotini", consider using a single label like "Pasta" to cover them all. On the other hand, be careful not to create labels that are too wide and general. Think of tags as a way to group your articles by specific topic so that readers can find related articles that interest them. If the label is too wide, many too large items will be included in the grouping. If you make the tag too specific, not enough items will be included in the package.
Find the perfect place where tags are important to your readers and guide them to a suitable list of related articles on each specific topic.
To assign tags to your WordPress post:
- Find the Tags field in the sidebar (on the right, under Categories).
- To add a new tag, enter a word about the article in the Tags field and click "Add".
- To use a tag that has already been created, simply enter it in the field exactly as it was used before (make sure the spelling is consistent and the plural or singular is used). Click the "Choose from the most frequently used tags" link to see the common tags you have used in the past.
- Remember to save your design after adding tags, otherwise the tags will not save.
Write a WordPress post snippet
Furthermore, by adding the article in WordPress, you generally want to enter content in the "Excerpt" field below the main article text box. The snippet is used in different ways depending on the blog layout, but it is usually used in conjunction with the featured image when displaying an article summary for your article (on your home page, if you have articles listed there, in search results blog, archive pages, etc.). By default, WordPress uses the first 55 words of your post as a snippet when a snippet needs to be displayed. But those first 55 words may not be the best representation of your article's topic, and they can also confuse the reader out of context.
You can enter your own text excerpt by completing the "Extract" field. In general, it makes sense to use text that summarizes the article and also "asks" the reader to click the link to go to the article itself. Make sure to save your draft after adding your excerpt, otherwise the excerpt will not save.
Previewing your article
Now that you have completed all the basic fields for your post and have formatted the post content the way you want it, it is time to see how the post will appear on your current website. WordPress allows you to see it exactly as it will appear on your live blog before publishing it, so you can make any changes you need before publishing it on your live website for the whole world to see.
To preview your article:
- Find the Preview button on the right sidebar (next to Save draft).
- Click the Preview button to see the page exactly as it will appear on the live site once it is published.
- Check the article and the format on the preview screen for problems.
- Return to the "Edit Post" screen to edit / make changes before posting the article.
- If you want to change something but cannot resolve it, please contact your account manager.
Publishing the article
Once you have verified that everything is fine with your item, you are good to go. You can post it right away or schedule it for a specific date and time in the future. To publish immediately, just click the "Publish" button at the bottom of the publish box (below the Save Draft and Preview buttons).
To schedule automatic publishing at a later time, click the "Edit" link in the section on the "Publish" button next to the "Publish now" item. Then select the date and time to publish the article. Please note that the time is based on the time zone in which your web server is configured. Do not assume it is your local time zone. Give it a try to see when it is actually posted, or ask your network administrator or account manager to check the time zone for you. Once you have set the date and time, click the "OK" button and then the blue "Schedule" button. Your article is now scheduled to be published automatically on the date and time you selected.
So, There you have it
The basics of publishing articles on your website using your WordPress blog. Remember, the goal is to publish high-quality original content. Avoid the temptation to simply copy content from other sources or mass-produce uninteresting fluff-filled blog posts just to keep producing a large amount of content. Pay attention to quality over quantity, and your blog will soon become a valuable asset to your website and your business. If you need help writing and publishing quality content, contact your account manager, who will help you get the most out of your blog.
What's Your Reaction?